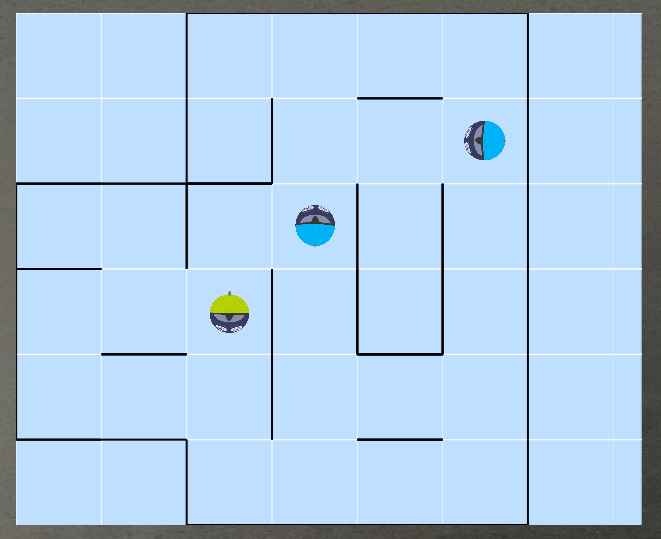
I will display the positions of your pod (green pod) and other pods (blue pods) on the grid. The display will be limited to the floor or stage your pod is currently on. Each white cell represents an individual block, and the black lines represent walls.

Once your pod arrives at the energy station, the button becomes active. By pressing the button, your pod’s energy will be recharged.
Please note that during the charging process, other actions will be disabled, so it’s safer to give up charging if other pods are in close proximity.
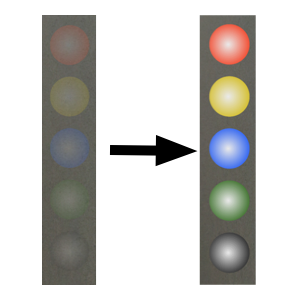
I will represent the status of the five color ball collection. The uncollected balls will be shown as dark, and the collected ones will be displayed brightly. Please note that the goal point will not be unlocked until all five color balls are collected.
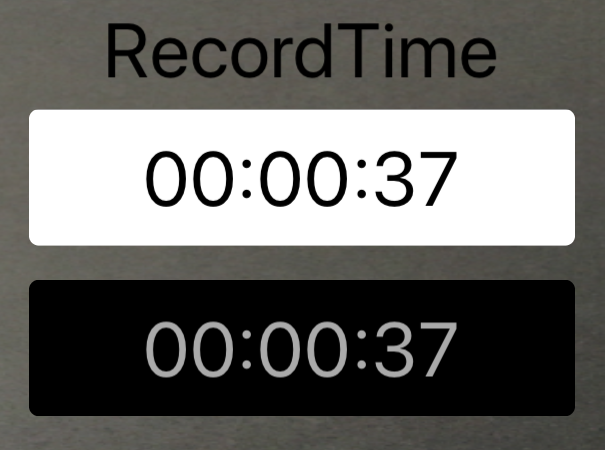
I will display the time records for this stage.
Upper row: Shows your personal best record up to this point. Lower row: Displays the elapsed playtime. The playtime starts from the moment your pod makes its first movement from the starting point.
Additionally, as the playtime surpasses 30 seconds before your personal best record, the text display will turn yellow, and when it goes past 10 seconds before your record, it will turn red, serving as a reminder. If you exceed your personal best record, the text display will become a light gray color.

I will indicate the energy status of your pod.
If your energy runs out, the challenge will fail. To prevent this, make sure to recharge at the energy station before your energy depletes.
The slider knob on the energy indicator will be green when the energy is above 200. When it drops below 200, it will turn yellow, and when it goes below 80, it will turn red, accompanied by a warning sound to alert you.
The maximum energy capacity varies for each stage. Stages 0 to 2 have a capacity of 450, stages 3 to 5 have 950, stages 6 to 8 have 1450, and stages 9 to 11 have 1950.
Please keep an eye on your energy level and plan your movements accordingly to successfully complete the challenge.
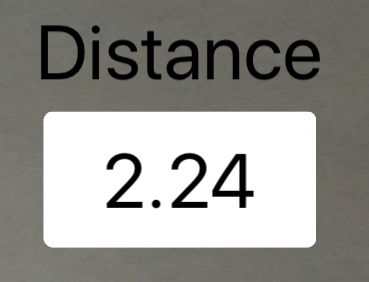
I am showing the straight-line distance (1 = 1 block) from your pod’s current position to the goal point. Please use this as a reference to find the goal point.
Please note that the straight-line distance is calculated in three dimensions, including up and down, and not just in the flat plane. Take this into consideration while navigating your pod towards the goal point.

I am indicating the floor level where your pod is currently positioned.
The starting point is on the 1st floor (1F). (The basement levels will be represented as B1, B2, B3).

I am representing the direction your pod is facing.
In the radar display, the upward direction is “North,” the downward direction is “South,” the right direction is “East,” and the left direction is “West.”
Recent Comments